![]() Back in the time before television went digital and High Definition wide screen was the norm, the state of the art video was shot on Beta SP and when digital was available, it was shot on formats such as DVCPRO and DVCAM. All of these formats were still Standard Definition. What that means is that the picture they created was mostly a square picture and it was only one forth the size of a normal HD TV of today.
Back in the time before television went digital and High Definition wide screen was the norm, the state of the art video was shot on Beta SP and when digital was available, it was shot on formats such as DVCPRO and DVCAM. All of these formats were still Standard Definition. What that means is that the picture they created was mostly a square picture and it was only one forth the size of a normal HD TV of today.
When preserving these old video formats, a simple video transfer digitization just turns that old small picture into a new small picture with no advantage except it is viewable as a digital version.
One thought to keep in mind is preservation instead of conversion.
This means taking that old small picture and not only digitizing it but doing what we call an UpRes. Because your new Television doesn’t always do a very good job of trying to enlarge small pictures to fill the entire screen. Usually doing this adds some very bad distortions to the video picture making viewing less than enjoyable.
Some processes promise to turn standard definition video into high definition but almost all of them fall short adding distortions that are completely unacceptable. The truth is, you can never turn low definition into high definition but you can make it a beautifully smooth image without any of the associated distortion and your High Definition TV will thank you for it because the picture displayed will look normal and natural.
Below are examples of the original Standard Definition and a High Definition process to Up Scale Resolution that creates a proprietary smooth clean picture to the old video and makes it compatible to new standards. You can view the embedded video samples below.
Compare the actual sizes and picture quality of each sample when viewing each version. Look for size differences, jagged edges on images and lack of filling the screen with the entire picture on the original small video compared to the HD video above it. These old video formats often had what is called Interlaced pictures. That means every other vertical line in the picture would show every 60th of a second. Nowadays Progressive shows an entire picture every 30th of a second. This is an important thing to keep in mind when UpRes is applied because converting an Interlaced image to Progressive can indeed create more aliasing or in other words increase the jagged edge distortion if not done correctly.
Another process that can be applied to old square video when preserving it for the future, is to do what is called a variable tilt during the UpRes scaling process to bring it to a wide screen standard and eliminate the black bars on the right and left of the image or avoid that stretched look that some new TVs do to force old video into a wide screen shape. TVs forcing an old video image is like forcing a square peg into a round hole… It looks terrible.
The last thing to consider is how long you wish your new preservation to last. There is only one medium today that can promise your new preservation will last longer than 100 years and that is to finalize it onto 1000 year archival discs.
The sample videos below when viewed on a computer are sized to represent the actual comparison size difference of SD versus HD video.
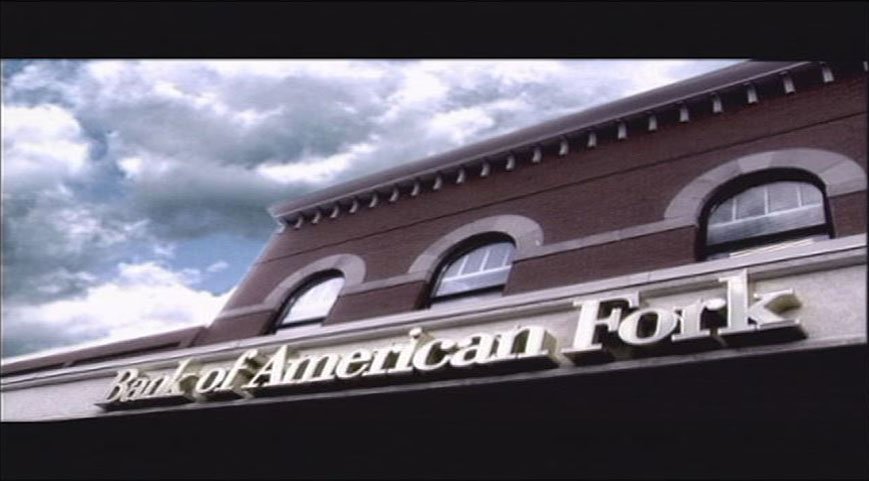
A Standard Definition Video Upscaled Example: Click to viewExample of Up-Res Enhanced
The video below represents SD to HD Preservation Process Level 3 Smooth:

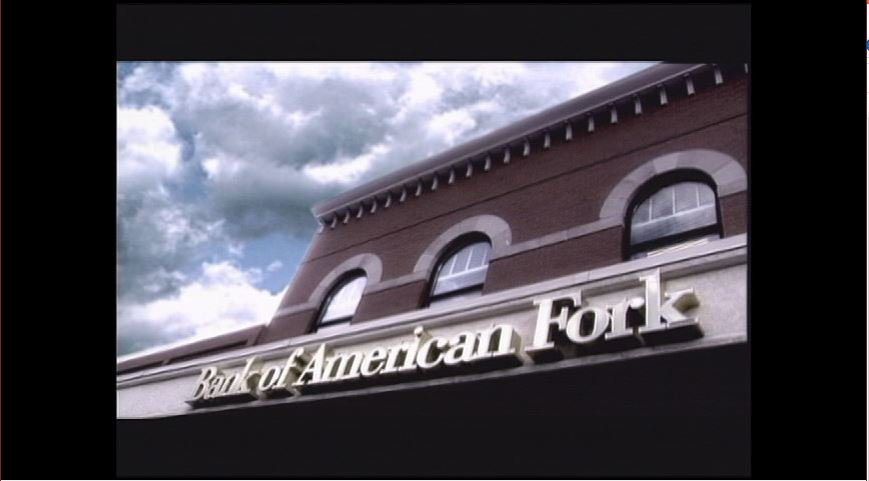
The next video below represents a Standard Definition original video transfer with no special processing:
Pay particular attention to any side to side motion in the video as you will notice an extreme sawtooth jagged like edge on some images. On vertical motions, you may notice a kind of wavy thin line effect.
You will also notice black stripes at the top and bottom of the video, indicating that the original production attempted to simulate a wide screen image… but old video never had that option. If this video were played on a High Definition television it would also have black stripes on the left and right as well as the black stripes on top if the TV displayed this SD video natively, so it would appear as an even smaller square in the middle of a very heavy thick black border.
The image below represents what an SD video shot to simulate wide screen would look like on a new High Definition TV:
If your Television is set to scale any odd shaped video to the TV’s native screen size, this is what the above video would look like… STRETCHED:
There is a difference between just digitizing old video and preserving old video for compatibility with the future. The other most important and overlooked process of video preservation is how long you want your newly resurrected video data to last. The most common mistake is to save the data on hard drives, flash drives, cloud servers or common optical discs. The only way to guarantee the data will be perfectly preserved for the next 100 years to to master it onto 1000 year Archival Discs.